


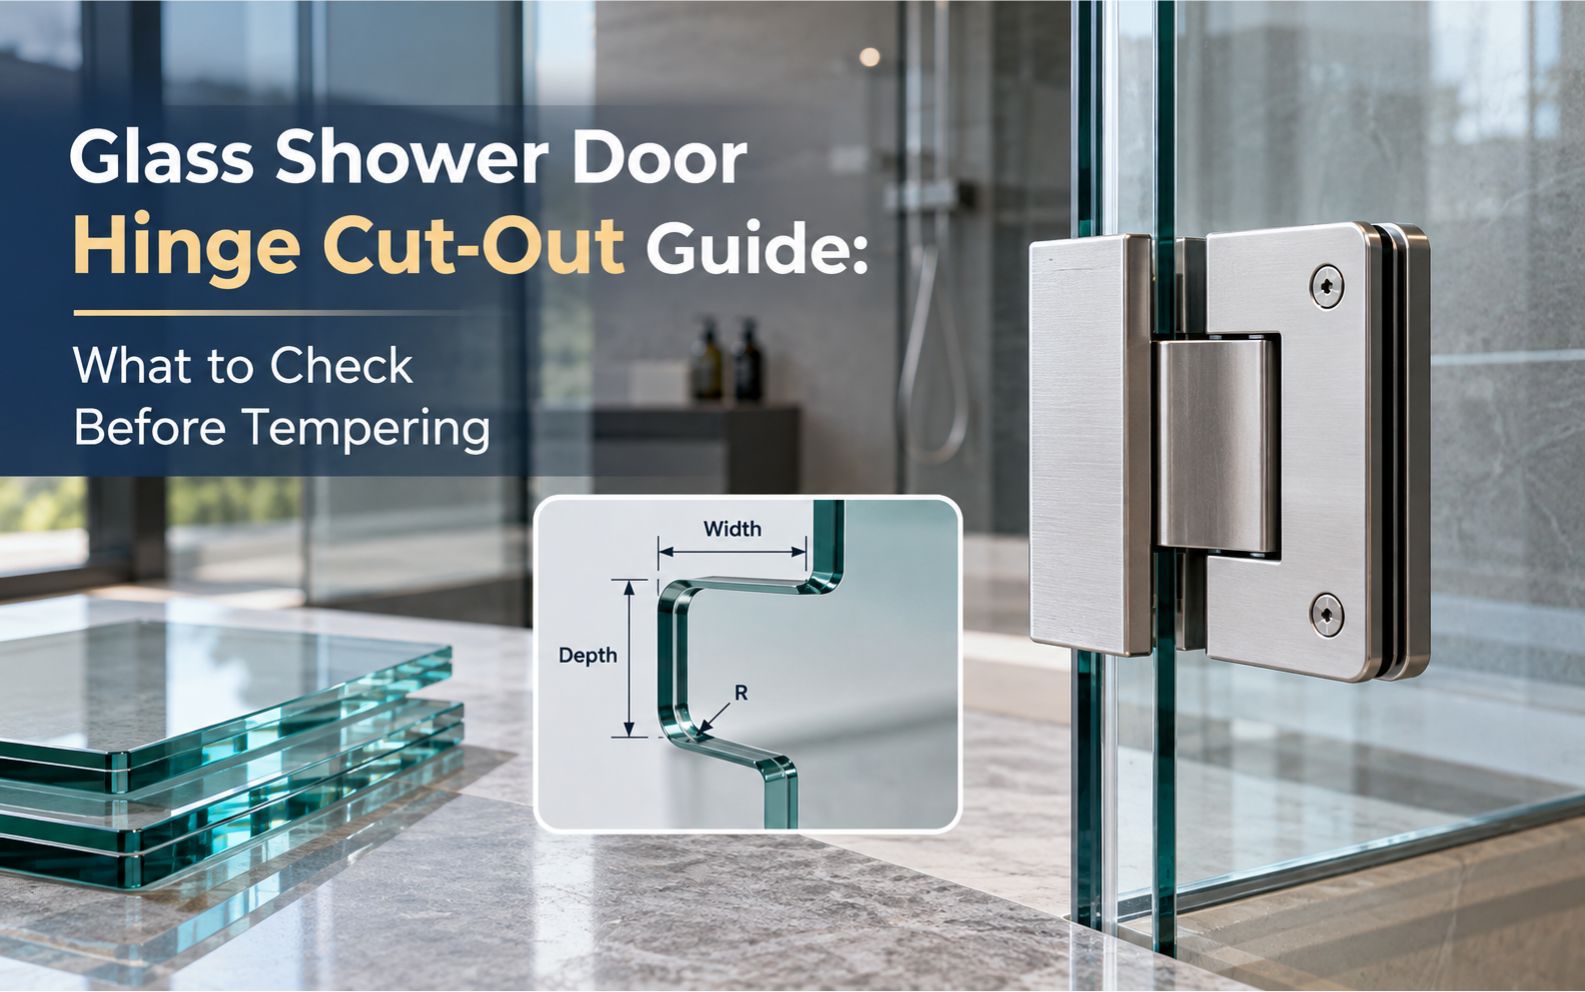
Before tempering shower glass, check every shower door hinge cut out against the approved drawing and the actual hinge. Confirm the cut-out position, quantity, length, width, depth, edge distances, and glass thickness. The internal corners of a cut-out should use the specified radius rather than a sharp 90-degree corner, and all machined edges should be smooth and polished without chips or visible cracks. Remove grinding dust and glass debris, then test-fit the real hinge before the panel enters tempering. This matters because tempered glass cannot be safely re-cut or re-drilled afterward. For two- or three-hinge doors, the cut-outs must also align correctly. A small machining error before tempering can become an expensive replacement panel, installation delay, or glass-breakage risk later.
1. First Identify the Hinge Glass-Preparation Type
Shower door hinges commonly use two broad glass-preparation methods. Some designs require only drilled holes for fixing bolts, while others require a shaped notch or cut-out at the glass edge. Buyers should never assume that two visually similar hinges use the same glass preparation.If you are still selecting the hinge type, see our Shower Door Hinges Buying Guide for a broader comparison of hinge structures, materials, glass requirements, and project applications. The hinge body, clamping plate, screw position, and pivot geometry can change the required drawing.
Hole-Only Shower Door Hinges
A hole-only hinge normally needs accurately positioned drilled holes but no large edge notch. The glass processor must confirm hole diameter, center position, distance from the edge, and spacing between holes. Even without a large cut-out, the drawing must be approved before tempering because incorrect holes cannot simply be moved later.
Cut-Out Shower Door Hinges
A cut-out hinge requires a defined opening in the glass edge so part of the hinge can sit around or into the panel. The shower glass hinge cutout must match the selected hinge closely enough for correct seating without forcing the metal body against the glass. This type requires careful control of shape, radius, depth, and edge finish.
2. Check the Shower Door Hinge Cut Out Drawing
The first inspection step is to compare the fabrication drawing with the physical hinge sample. Verify the number and position of cut-outs and all marked dimensions. Then place the real hinge at the prepared opening to confirm that it can enter and sit naturally without interference, binding, or an unexpected gap.
A common B2B problem is using an old drawing with a revised hinge or another supplier’s model. The product name may look the same while the glass hinge cutout dimensions differ. Link the approved hinge sample and glass drawing to the same model number.
3. Check Shower Door Hinge Cut Out Corners
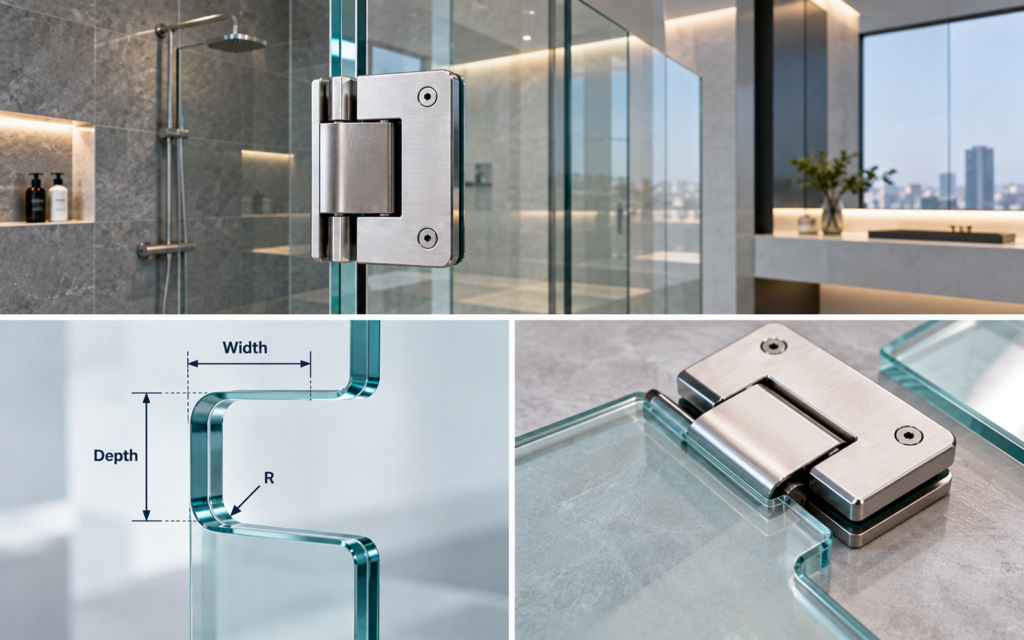
One of the most important details in a shower door hinge cut out is the internal corner. A machined notch should follow the specified R-radius rather than forming a sharp inside right angle. Sharp corners create stress concentration points, which are undesirable in glass that will later be tempered and repeatedly loaded by a moving door.
The correct radius must come from the approved hinge and glass-processing drawing, not a site guess. Ask the processor to verify every internal corner before tempering, especially where a notch changes direction.
4. Inspect Edge Grinding and Polishing
After machining, inspect the complete cut-out edge as well as the four outer edges of the panel. The surface should be properly ground and polished according to the project requirement, with no obvious chips, breakout, or hairline cracks around the processed area. A rough edge is not only unattractive; defects near the hinge zone can become stress-sensitive points.
A Practical Workshop Check
Run a fingernail carefully along the accessible processed edge. It should feel smooth rather than sharp or jagged. If defects are found, they should be evaluated and corrected by the glass processor before tempering rather than accepted because the hinge cover will hide them.
5. Re-Measure Shower Door Hinge Cut Out Dimensions
Do not rely only on the cutting machine program. Re-measure the shower door hinge cut out length, width, depth, and its distance from the top, bottom, and side edges of the glass. Also confirm the centerline where relevant. These measurements determine whether the hinge sits in the intended position and whether multiple hinges share the same alignment.
For B2B production, an inspection sheet can record nominal dimensions, tolerances, actual measurements, and results. This is especially useful for hotel or apartment projects where one incorrect machining program could affect many panels.
6. Confirm 8 mm or 10 mm Glass Before Production
Glass thickness must be confirmed before the hinge drawing is released. Frameless shower doors commonly use 8 mm or 10 mm tempered glass, but the required hinge preparation can differ by hinge model and thickness. The cut-out depth, gasket arrangement, clamp space, or fixing detail may not be identical for both panels.
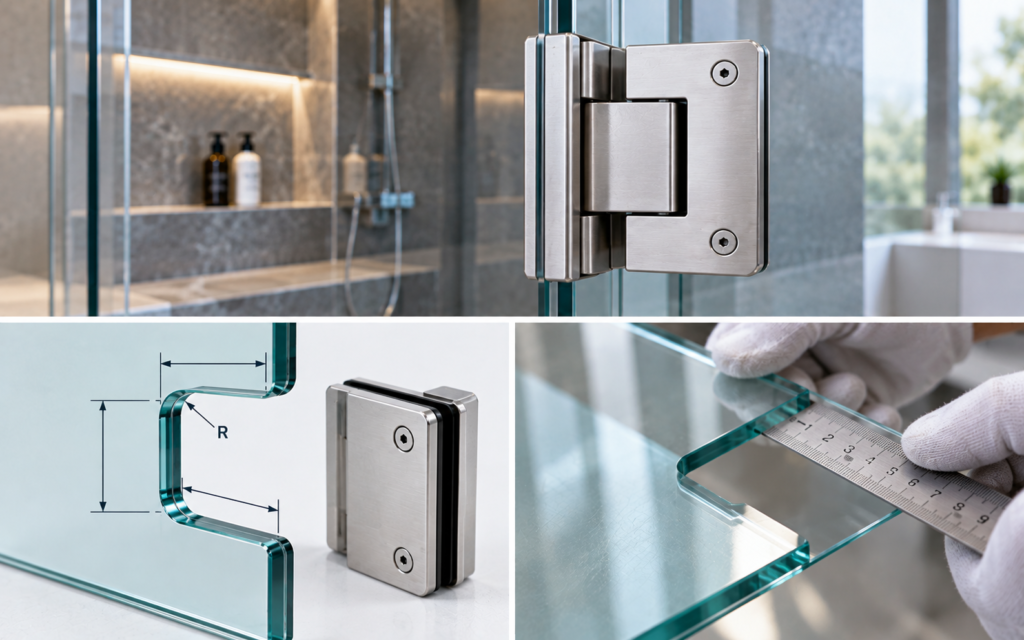
Send the exact glass thickness with the hinge model. Do not automatically copy an 8 mm drawing for a 10 mm project. The supplier and processor should confirm that the hinge, gaskets, screws, and cut-out drawing belong to the same specification.
7. Remove Dust, Burrs, and Glass Debris
Before tempering, clean the machined area thoroughly. Remove loose glass particles, grinding residue, dust, and any debris left inside the notch or holes. Clean preparation helps the processor inspect the true edge condition and avoids carrying contamination into the next production stage.
For repeated batches, cleaning should be part of the pre-tempering inspection. A clean cut-out makes chips, cracks, poor polishing, and dimensional problems easier to see before tempering.
8. Check Alignment on Two- and Three-Hinge Doors
When a shower door uses two or three hinges, inspect the cut-outs as a group rather than one by one. Their positions should follow the same vertical reference and the approved hinge spacing. Misaligned openings can force the installer to twist or shift a hinge, which can distort the door position and create uneven loading.
Three-hinge doors deserve extra attention because there are more interfaces to align. The top, middle, and bottom hinge locations should be checked against one drawing. If the project uses two heavy-duty hinges plus a compatible supporting hinge, confirm that all required cut-out shapes and dimensions match the approved hardware before tempering.
9. Test-Fit the Actual Hinge Before Tempering
A physical trial fit is one of the most useful final checks. Place the actual frameless shower door hinge into or against the prepared opening and confirm that the metal sits correctly, the fixing holes align, and no part of the hinge interferes with the glass. For pivot-hinge projects, review our Glass Shower Door Pivot Hinges guide before finalizing the glass preparation.The hinge should not need to be forced into the notch.
For large B2B orders, test-fit the first approved panel before mass production. This gives the glass factory, hardware supplier, and installer one practical reference and can catch drawing or model errors early.
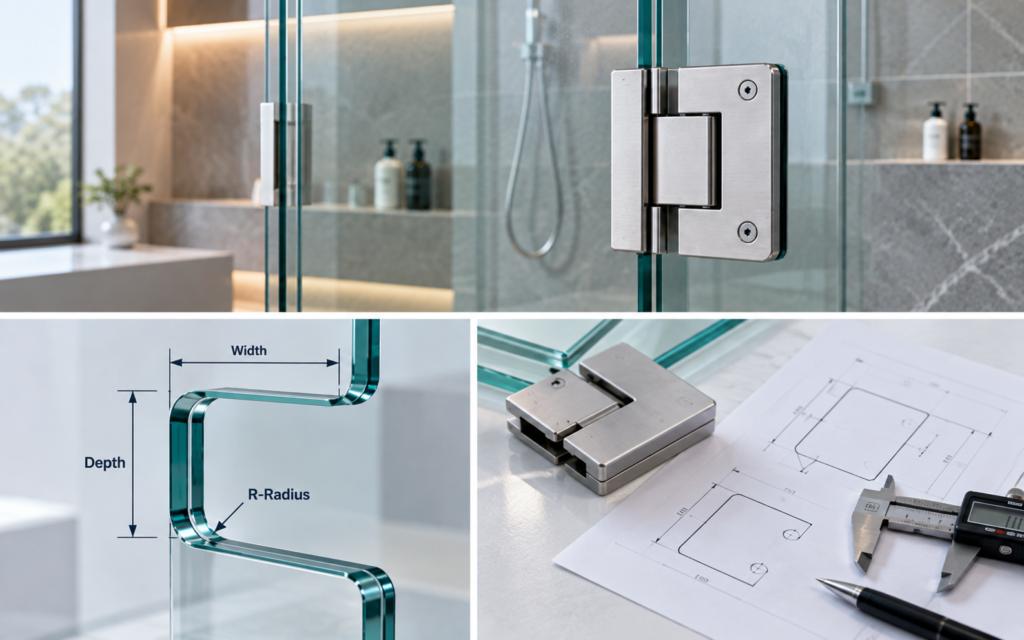
10. Coordinate the Cut-Out With Related Shower Hardware
Hinge preparation should also be reviewed as part of the complete shower enclosure. Related products may include zuhanykabin-fogantyúk, shower glass clamps, zuhanytámaszok, magnetic seals, U-channels, knobs, and sliding shower door hardware. These product terms provide useful internal-link opportunities on a shower hardware website.
The handle hole must not conflict with the hinge layout, while a support bar or fixed-panel clamp can affect the glass arrangement. Put all glass preparation on one final drawing to reduce conflicting dimensions.
11. B2B Pre-Tempering Checklist
Drawing and Machining
Confirm the hinge model, cut-out or hole type, quantity, position, length, width, depth, edge distances, internal R-radius, and glass thickness. Inspect polished edges for chips or visible cracks, then clean all processed areas. For multiple hinges, verify horizontal and vertical alignment according to the approved drawing.
Final Sample Approval
Test-fit the actual hinge, confirm that it seats without interference, and compare the panel with the approved sample. B2B buyers can also review our guide on How to Choose Shower Door Hinges for B2B Projects before approving hinges for mass production.Only after the drawing, machining, edge quality, cleanliness, glass thickness, and hinge fit are accepted should the panel proceed to tempering. Local glass-fabrication standards and the glass processor’s requirements should also be followed.
Következtetés
A reliable shower door hinge cut out begins with verification before tempering, not correction during installation. Identify whether the hinge requires holes or a shaped cut-out, compare the drawing with the physical hinge, use the specified rounded internal corners, inspect polishing, re-measure dimensions, confirm 8 mm or 10 mm glass, remove debris, and check alignment on multi-hinge doors. Finally, test-fit the actual hinge. This workflow helps B2B buyers reduce wrong glass preparation, replacement panels, installation delays, hinge misalignment, and avoidable glass damage while keeping the shower door hardware and glass processor on the same approved specification.